Showing posts with label PLT Anytime treats. Show all posts

Friday, 7 March 2014

Hazelnut and strawberry cuppycakes

Children in my family became interested in my food only after I started making cupcakes...or cuppycakes as my little 7 year old niece calls them.Initially they were only for the kids...when I realised that adults found them equally appealing,I started making healthier versions of different flavours.While I am aware that certain ingredients aren't always easily available,I would still like to mention them,as you never know when you may come across them at the store...and when you do,you will at least have the option of using them in a recipe !

Having featured this recipe in my last series of "moms in a hurry" for the hindu metroplus...I realise that this was closest to my heart...while I enjoyed writing them all,this one in particular reminds me of very special moments in my life...that of being in the family way ! This year seems to be the year of babies,many cousins and friends of mine are awaiting their own bundle of joy,very soon !A woman, I think, is known as a mom when she introduces her own little being to the world !

These days women work up until their last term of pregnancy leaving very little time to allow themselves to be pampered much to the disdain of their mothers and grandmothers !!!However the practice of plying an expectant mother with special treats continues even today.With that in mind,these little cuppycakes are for those gorgeous women who are awaiting the arrival of their little ones who will make their world an even better place to be in ! Love and hugs to you all ! Welcome to my club...it takes priority over all my other clubs and I'm delighted for you to be a part of 'The mommy club' !
 
Recipe for hazelnut and strawberry cuppycakes
Ingredients
70 g -toasted hazelnuts (almonds are also an option)
170 g butter
3 eggs
140 g Castor sugar
115g self -raising flour
Vanilla essence-1 and 1/2 tsp
Strawberries-10-chopped into bits (just before serving)
Method
Pre-heat oven to 180 degrees C
. Line the cupcake tin with paper cases.
 Remove the skin off the toasted hazelnuts by rubbing between the fingers. Chop finely and set aside. Beat together the butter and sugar until pale and creamy.
 Beat in the eggs until well combined. 
 Sift in the flour. Fold in gently.
 Mix in the chopped hazelnuts. 
 With a small spoon, dollop into the paper cases, until half way up.
 Bake until risen and golden, approximately for 10 minutes or until a small skewer inserted comes out    clean. 
Allow to cool. 
Top with a butter cream frosting. Just before serving add the chopped strawberries.

Butter cream frosting
75g soft butter
125g sifted icing sugar
1 tsp vanilla essence
Beat the butter until fluffy,add the icing sugar and vanilla and continue to beat to a firm icing. Spoon into a piping bag fitted with a star nozzle and pipe swirls or just use a flat knife and spread it across

Sunday, 23 February 2014

Rocky road for moms


Say the word 'treat' and the next word to follow will be, 'children' !!! Sweets ,chocolates ,cotton candy,lollipops are all bites of yummy happiness that are associated with children. So when I was asked to write an article for mothers...it set me thinking,while we certainly aren't overly enamoured of candy,we do indeed love the occasional sweet treat.In my book sweet indulgence/decadence= chocolate !!! At the same time ,it had to be more than just an indulgence,it had to satisfy on the nutrition aspect as well ! So,dark chocolate,it was,loaded with antioxidants,this is something you are advised to eat a bit of  every day.

Cranberries along with walnuts and almonds are glorified as having various health benefits..so why not have them come together in a delicious and healthy mommy snack ?!!?!
After all...Moms need rocky road too !!!!! Now, there was a combination that would work,so after eliminating ,the marshmallows,the m&ms and the golden syrup...I set to task making this grown up version of rocky road with digestive biscuits,cranberries,nuts and honey ...I'm pleased to tell you that it passed the test with rave reviews from both mommies and kiddies alike ! It's not as chunky as a regular rocky road but these thin squares are just perfect !


Rocky road for momsdigestive Biscuits-180g powdered
Dark chocolate-200g (you could use bournville or  milk chocolate if you prefer)
Cranberries or raisins-1/4C Almonds-25 g-chopped 
Walnuts-25g-chopped
Soft unsalted butter-2 Tbsps
 Honey-1/4C
Method
Grease a medium sized square dish and set aside.
Over a pan of boiling water place a big bowl,with the chocolate,honey and butter,the heat of the boiling water will melt the chocolate and butter..swirl it gently and do not stir often.
Once it has melted to a yummy liquid chocolate goo...set it aside. 
Once it has cooled slightly,add in the powdered biscuits,cranberries and nuts and mix in thoroughly.
Dollop it into the greased dish and flatten down well with the back of the spoon.
Refrigerate for an hour or two
Once it's firm,cut into squares or rectangles ,to serve.
This being such a versatile recipe ,it's easy to play around with it depending on what kind of flavours you like with chocolate,you can make it as healthy or as plain as you like it...takes very little time but the results are unbeatable :)

Saturday, 15 February 2014

Beet,bread and mint snack

Snacky food is a favourite with most people ,especially children...they go down far more quickly than regular meals do ! While it is a hard task to get them to not snack especially when they are in the age group of 10-18,what we can do is offer them healthier snacking options !

This recipe came about 1 evening when I had 6 hungry teens in my home after school...it had been a long day and I did not find the time to venture out to pick up any other ingredients with which I could've made some of their favourites ! However i wasn't going to let that deter me from whipping up a tasty snack ! Beetroots were a plenty in my home and my family love the flavours of beets,lemon and mint.You should've seen the curious glances and the questioning 'what is this ,aunty?' looks....they took one hesitant bite..they are all far too polite,to refuse anything outright and whadya know ,the platter was empty in minutes...nothing could've made me happier,especially hearing the accompanying sounds saying,"mmm" '"yummy", "oh yum"...so do try,you won't be sorry !Honestly it's occasions like this which motivate me to keep experimenting and sharing with you all !

 Recipe for Beet,bread and mint snack-serves 6
Ingredients
Beetroot-2 steamed with the skin on
Pizza bases-2 (you could even top this on toasted bread,roasted potato slices,on some mozzarella discs ...)
Mint leaves- a small hand full
Olive oil-5 tbsp (EVOO)
Salt ,pepper to taste
juice of half a lemon
 Garlic-1 clove

Method
Brush the pizza bases with a bit of olive oil and bake in a hot oven,until golden,set aside.
Now peel and chop the beetroot and add to the blender with the garlic,salt,pepper and lemon juice
Blend well and you will get a grainy puree'
Add the olive oil and blend again...it will turn smooth and silky
Check and adjust seasoning.
Now cut up the pizza bases into triangular wedges
Top with a spoonfull of beetroot puree' and garnish with a fresh mint leaf
Serve with some lemon wedges.

The colours look absolutely mouth watering :)))


Wednesday, 12 February 2014

Keerai (spinach) Vadai

A lot of parents today are faced with the unfamiliar task of having to cut down the calorie intake of their young child...the reasons being many...the staggering variety of eats from all over the world, available at your neighbourhood store,which was never so easily accessible before...the awareness of children,today,who at a very young age know what flavour of cupcake they want and where to get it from...and the exposure to a huge array of flavours,that in turn make ,eating simple food,a rather herculean task !

This simple recipe which can be served at lunch or as a snack is very tasty and is eaten without a grumble...the fact that ,in my home,they have to eat it,grumble or not ,is a different matter altogether !!!! That's what we were taught as children and I pass the very same lesson on ,to my own...and have been quite successful,thankfully !In our Indian homes, in the South,it's not uncommon to find families relishing these vadais with a hot cup of tea :))

My friend,asked if I could suggest a few easy options for healthy after school snacks,that required no cheese,butter,sugar...keeping in mind the calorie count.As harsh as that may seem,for a child...it's wise to do so,especially when they are at the age of 9 /10 years old, because that paves the way for healthy eating habits from then on ! Popcorn (not the packaged kind), tempered puffed rice , roasted nuts...I taught ,along with my kids,myself as well, to relish dried fruits like figs,raisins and dates...boiled /roasted corn on the cob,boiled peanuts,banana and yoghurt smoothie,whole grain crackers with a hung curd topping,sprouts made tangy with lime and chilli...all yummy options which don't leave you feeling deprived.

These are suggestions only for the concerned parent who need to help their child with attaining an overall wellness...children who are otherwise of normal health should eat everything in moderation but in my opinion still be aware of the quality of food that they fill their stomachs with ! That I think is the only way to prevent the diseases that suddenly seem to have become common around us,today !Also I believe that if we eat healthy ,by example,the kids are bound to do so too...so...no need to obsess about it but if we can take the healthier alternative,why not ?!!!

Purple spinach leaves
These fresh purple spinach leaves seemed to be calling out to the 'mom' in me to cook up something wholesome and appealing..."keerai vadai" is one option to use up a whole lot of spinach (keerai) and is also far more interesting than a simple keerai poriyal(stir fry),which might not be eaten in the same quantity !!! 


Crispy hot keerai vadais
These vadais are a great low carb option and very nutritious with the addition of channa dhal (bengal gram)and they aren't deep fried !
Recipe
Ingredients
Spinach-300g( washed and chopped)
Onions-2(finely chopped)
Green chillies-2 finely chopped
Ginger and garlic paste-1 Tbsp (optional)
Bengal gram/Channa dhal( kadalai paruppu)-3/4 C -washed and soaked in warm water for an hour and a half
Fried bengal gram (pottu kadalai)-a small hand full
Oil,salt to taste
asafoetida-a pinch
Method
Add a little oil in a pan,add the asafoetida
Saute' the chopped onions,until soft
Add the chillies, spinach leaves,salt and the ginger and garlic paste.
This ensures that the g&g paste won't catch and burn
When the spinach wilts slightly,stir and take off heat
Press down and remove the excess water...this removes the lingering bitterness(and sadly some nutrients!!!)Check seasoning.
Blend the soaked  dhal with a bit of salt(after draining the water) to a coarse puree'
Mix it by hand into the spinach mixture,add the fried bengal gram,shape the mixture and flatten and set aside.
Heat about a spoon of oil on a hot tava or frying pan and cook the vadais on either side ,on a low flame ,until golden and done.
Serve hot.

Note:The flame needs to be kept on low to ensure even cooking ...also making it flat helps the vadais cook faster in less oil(to avoid deep frying),in this recipe you will find the spinach ratio is higher than that of the dhal...since we are cooking the spinach a bit...(it still retains it's colour as you can see),a light crisping on the tava will do !


Wednesday, 11 December 2013

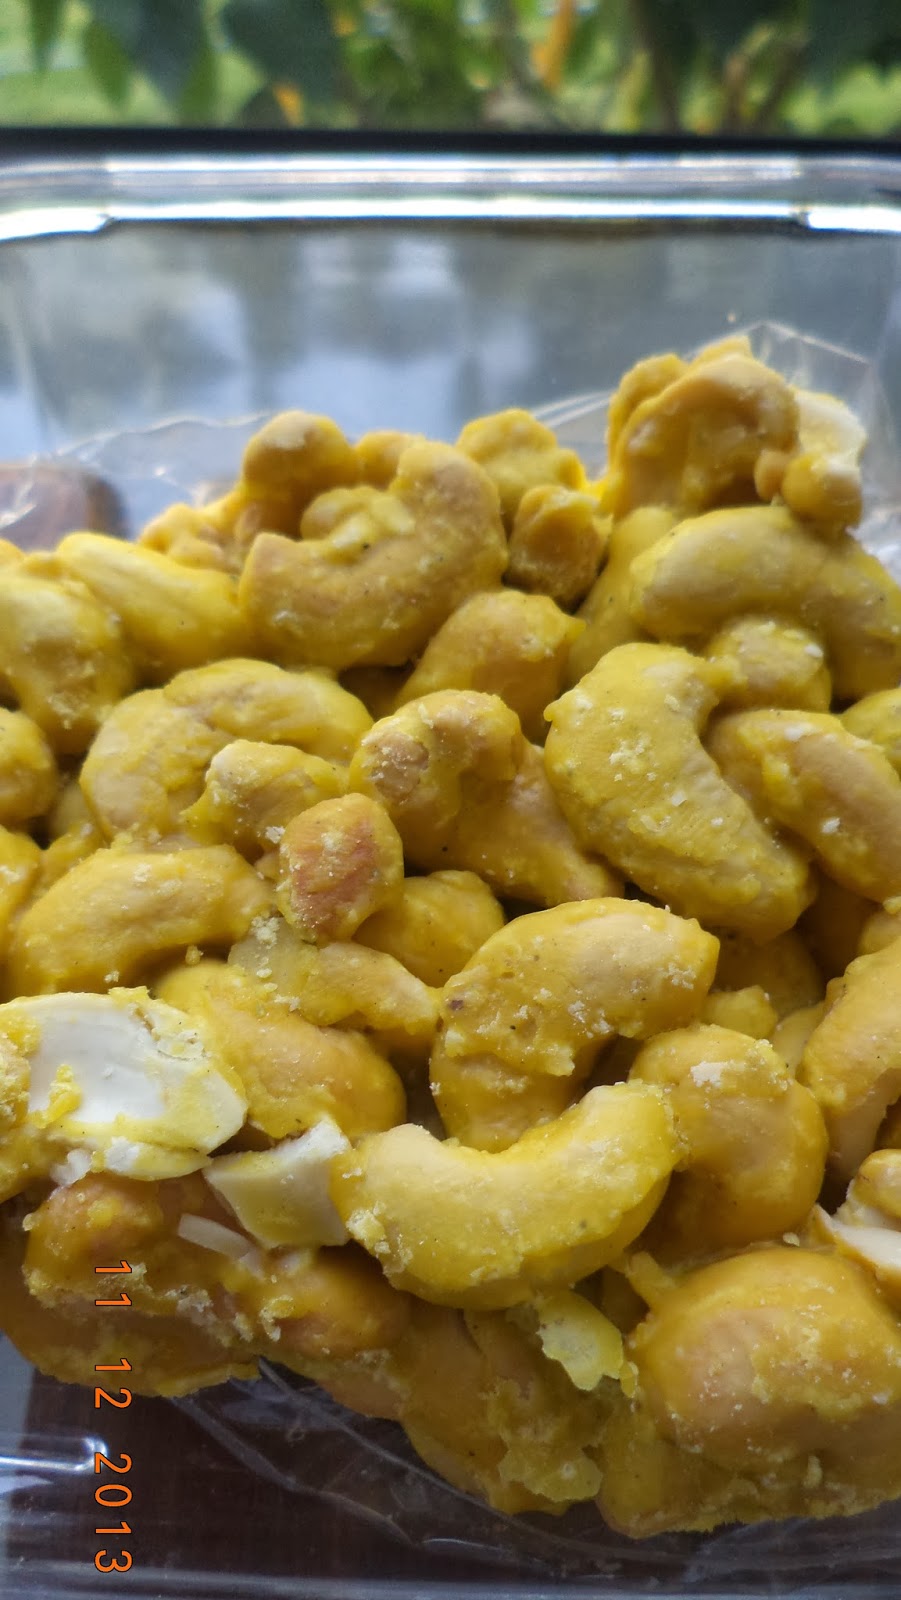
Cashewnut toffee (Jeedipappu Pakam)

Welcome distractions kept me away from writing,unexpectedly...traversing in the land known for it's pesarattus, layered biryanis , spicy podis and pulsus...Hyderabad is indeed a melting pot of many customs and cuisines...the mughal influence is completely showcased in the city's food , architecture , customs and language ! The city is unique in that it offers the culinary heritage of the telugu hindus and that of the royal mughals who made their mark and continue to do so in all areas of day to day living.
Weddings in India are an experience in themselves and one in the family is even more so...the laughter of children,family banter late into the night,while tucking into delicious morsels of food truly makes for great memories in the years to come.
Gifting sweets is a time honoured Indian tradition,a custom that is all the more special during an important celebration ,like a wedding...the famous Jeedipappu Pakam...an elevated decadent version of the chikki is a firm favourite among food lovers evrywhere...a very famous sweet and most travellers,on leisure, to the city of Hyderabad ,will definitely be presented,to carry back home, a packet of these delicious cashew nut morsels !
G.Pulla Reddy-the one stop shop for delicious sweets and savouries,foodies from everywhere visit this place to carry back delicious treats !
Golden , crunchy  and delicious,it can be very addictive,so beware !
I give you ,one of the most authentic recipes from a very reliable source,should you want to make it at home...
Recipe for Jeedipappu Pakam
3 C cashew nuts (whole)
3/4 C jaggery (or soft brown sugar)
3/4 C sugar
1/2 tsp ghee
1 tsp cardamom powder or a few whole green cardamom smashed (optional)
Method
 Grease a flat metal pan with ghee and set aside

In a wide heavy bottomed pan,add the sugar and jaggery along with the water ,on low heat
As it melts ,swirl the pan,do not stir and bring to the boil
As it bubbles away,keep swirling,until it turns thick and syrupy...it will be a slow sticky bubble around the edges of the pan
Quickly add in the cashew nuts and cardamom (if using ) and stir to coat,turn off heat and pour mixture onto the greased pan.
Wait for it to cool and break into pieces or leave as one solid block and break off as and when you want to eat it.
Store in an airtight container
Do try this recipe and share your thoughts !


The ring murrukku,another lip smacking treat that is popular at G.Pulla Reddy :))

Monday, 2 December 2013

Tempered whole grain bread

It's cold and raining...finally the monsoon has arrived, I hope, after playing truant all this while ! It's absolutely  amazing how weather starts hunger pangs... especially the rains...the South Indian in me was craving for something hot and spicy and quick...whole grain bread to the rescue !!! This dish has many versions and is eaten as a snack or as part of a main meal...it's also known as 'rotti upma' rotti meaning bread in Tamil and upma is usually any kind of carb tempered with spices...for me this dish brings back memories of my mom eating it on a rainy day...not very different from today....relaxed and peaceful  as she ate it with a mug of steaming hot tea beside her,around the time that we got back from school,past 4pm !
Today after a very long time,it was with the same kind of calm quietness that my family and I relished this simple bowl of food...feet crossed ,seated at the bay window,watching the pelting rain and the trees which somehow seemed to have gotten greener in the passing hour...or was that just my brain  sending happy signals of a tummy satisfied with food ?!! ;))
As you can see,it 's not fried,just a very light tempering of spices with a dash of buttermilk for the sour tang...along with sweet taste of the sauteed onions and the unmistakable bite of green chili,it certainly hit the spot ! Since it was just a early evening snack, 3 slices of bread was perfect for 3 ,slightly hungry people !!!
Ingredients
Whole grain bread- 3 slices...cut into squares
Small onions- 10-chopped
Green chillies-slit and de seeded-2

Mustard seeds, urad dhal,curry leaves- for tempering
buttermilk-1/4 c
Oil- 1 Tbsp
salt
Method
In a shallow pan,add the oil..once it gets slightly hot,
Add the tempering ingredients
Add the onions and green chillies and saute,add salt
The salt brings out the water in the onions and doesn't let it crisp up
Add the bread,turn the heat down to low and toss well
Add the butter a tsp at a time ,until it gets soaked up
Leave it on low heat for a few more minutes until it's not too dry or soggy
Serve hot with a steaming beverage of choice....a dash of rainfall will add to the flavour !!!!
 That is the sign of a well relished bowl of food !!!....The next time it rains,get your taste buds and ingredients ready for simple tastes to explode in your mouth , bringing with it immense satisfaction... I could almost hear my family purring with contentment...Lol !

Monday, 11 November 2013

Baked Banana Chips

Banana Chips...sweet and savoury is such a popular snack and more famous in the South of India ,than in other parts. Made with the unripe banana,it is full of flavour and is a delicious accompaniment to a traditional South Indian lunch or as a snack. It's not uncommon to find requests from people from other parts of India or the world for a few kg of Banana chips...and they do have their own preferences about which store to buy it from.No matter how many establishments sell these banana chips,they do almost always end up selling most of their stock everyday and since a lot of them are family run small enterprises,one is always assured of quality and freshness.
A flavour very different obviously to the more common potato chip...the texture is also not as thin and as such does not give you the taste of oiliness as can sometimes be the case of store bought potato chips.These banana chips are very famous in the city of Calicut,in the state of Kerala...so famous ,in fact that I would not be surprised if it soon carried a GI tag !
The unripe banana takes to flavours beautifully not unlike any other starchy vegetable....so,chili,lime,mint,salt are some of the popular savoury flavours,while the sweet flavours comprise of jaggery,honey or those which are made with a naturally sweeter version of the banana. While these deep fried chips are not the healthiest,even though a banana comprises of so much nutrition.....I wondered if there was another option to eat these crisp banana slices without the extra helping of oil...I give you the recipe for baked banana chips...the lime needs to be added to prevent discolouration..do try :)


Baked Banana Chips Since these keep well in an airtight container,it's a good snack option to carry while travelling,or in a kid's snack box.

Makes about 60 chips
Prep time: 15 minutes
Cook time: 3 hours

INGREDIENTS
 5 unripe bananas, peeled
1 cup fresh squeezed lemon juice
Cooking spray / lightly brush the baking tray with oil
Salt to taste

INSTRUCTIONS
    1. Preheat oven to 200°F. Coat a baking sheet with cooking spray or lightly brush with oil
    2. Cut bananas into 1/4” slices. Dip them in lemon juice, then place on a prepared baking sheet.
    3.  Bake, turning over once, until golden brown and crispy, about 3 hours.
    4. When slightly cool,sprinkle with salt and mix gently .

Wednesday, 30 October 2013

Thoothukudi macaroon

Sugar confections as light as air and crisp to the palette...few can resist such a sweet treat...while succeeding in getting the texture and temperature right while baking Meringues....the macaroon (different from the french Macaron) especially the Thuthukudi macaroon brings a completely different taste experience in texture and in flavour ! While it still retains the airy crispiness of the Meringue,the nuttiness from the ground cashews is so delicious that you find your hand involuntarily dipping into the box for another bite of exploding tastes and textures...that can only be a Thoothukudi Macaroon !
Yes,lucky me...a big bag of these delicious macaroons arrived at our doorstep along with wishes for a very happy Diwali...surrounded by loving family and friends,it could only be that ! Did I stop with eating just one ,you ask...i would be lying if I said yes ;) !!!! Thank goodness there are many others who love this amazing Thuthukudi macaroon as much as I do....otherwise I could very well do justice to the lot myself ! If you are tempted looking at the picture and my description,I'm glad because you should get some delivered to your doorstep,some things in life just have to be experienced and this is one of them,for sure !!!
This recipe is from an article in The Hindu...where they met the master bakers and tasted this yummy morsel of confectionery !
HOW IT’S MADE
Ingredients
Eggs 12 to 15
Cashew nuts (Some recommend 1/4 kg)
Sugar 1/2 kg.
Method
Powder cashew nuts, set aside. Crack eggs and separate the whites ensuring not a single drop of yolk falls in. With an egg beater, whisk the egg whites in a large bowl. When they turn frothy, start adding sugar little by little while continuing to vigorously whip up egg whites. Keep beating till the mixture rises into stiff peaks. Gently fold in the powdered cashews. Scoop batter into a stiff paper cone and squeeze cone to shape pointed macaroons. These macaroons are generally baked in firewood ovens, but baking them in electric ovens at 70 degrees may also achieve a similar result.

" Unlike other Indian pedas with ethnic flavours, the Thoothukudi macaroon is a European export and a vestige of colonisation, albeit reinvented in a unique shape. For around the world, the macaroon is mostly flat and filled with almonds, chocolate or coconut; only in Thoothukudi, it is stuffed with cashew and shaped into a cone with a round base, bulging middle and a pointed peak."-The Hindu archives
Just 3 ingredients...no butter,no oil,more the technique involved in creating a treat so delicious that it is coveted by hundreds of people on a daily basis...1kg costs about rs.600 on an average...not a street food says the master baker,this is high quality confectionery traditionally baked in wood ovens !

Thoothukudi or Tuticorin as it was also referred to still continues to have the greatest turnover of these amazing macaroons,while many have tried to set up bakeries in Chennai and Bangalore along with master bakers,to make these macaroons,they insist that it just does not taste the same...maybe it's all in the air...the magical air of Thoothukudi ;)))...do buy them and store them in an airtight container ,they go soft in a few minutes if kept open...so container to mouth is my suggestion...well your hands need a workout too ! :D ENJOY !!!


Sunday, 27 October 2013

Play with your food

 While we all at one time or the other have told the kids to eat quickly and to stop playing with their food...
As children we have always at some point  been very imaginative and with food too,whether it was putting bits of puffed rice (pori) in the corners of the mouth and pretending to be Dracula or a devil or whether we made faces on sandwiches with ketchup or on Marie biscuit with chocolate sauce...food always has a fun element to it...I'm always delighted to see attempts made by parents to make simple food appear fun....the delight for both the creator and the person for whom it is created for
with such care and love !
This platter of broomsticks was made for a Halloween party by a very creative mom and it made me wish that I had eaten one...a pretzel stick as the handle and a cheese slice wrapped around and snipped and a spring onion bit to go around...and each one so neatly done !!!! Adorable !

How adorable are these mice ?!!!!This pic and recipe were sent to be by a reader and friend from Canada...what i further love about this kind of food is that it involves no cooking whatsoever...how fun to introduce such 'cooking' to little ones...I've always been a big fan of Heston Blumenthal whose food is not really what it seems...more about him later...so ,the next time you have a bit of time on your hands ,do play with your food,no better reward than big smiles...on your face and those of others ;)))
These cookies would absolutely delight a little child....made by Just bake ...a bakery in Bangalore...they are said to be delicious apart from looking incredibly pretty....pretty pretty food !


Saturday, 26 October 2013

Witches' Hats Cupcakes

Halloween parties...thanks to comics and movies,the kids are so aware of Halloween and all the fun associated with it...an American tradition is soon catching up all over the world...It is so fun planning the food for a halloween party and of course dressing up ! Thanks to such dos ,I find myself engaging in very unfamiliar work of thinking a bit out of the box and coming up with ideas with what is available here...here is my feeble attempt at witch's hat cupcakes...the picture in my head was a bit different let me tell you...I really was not going to share this amateur messy creation with you but since the kids and adults loved it...I thought maybe I could share it with you after all ;P
The idea was to invert ice cream cones onto the cakes and paint them black...wasn't so simple...the cones being rather thin...the water icing would make them soggy...so decided to melt chocolate and add black food colouring...this had to be applied gently as the base of the cone when inverted was very fragile... I could not do the green band that i wanted to because then the chocolate would get wet again and merge with the frosting...the next time I attempt this maybe thin shreds of a green mint leaf can be wrapped around :)
So,then these cones were inverted onto simple frosted cupcakes and some more frosting was dribbled on the base and sprinkled with orange and black halloween hundreds and thousands....which also happily rolled around the floor...what a mess...but nothing like the satisfaction of finishing what you started,especially if it brings happiness to those around you !


Thursday, 24 October 2013

Soanpapdi aka Fairy floss

Soan papdi or Sohan papdi is a popular snack sold in India, Bangladesh and Pakistan...there isn't an Indian I know who hasn't loved the taste of this as a kid...as an adult ,sadly it feels rather a decadent dish to indulge in knowing the ingredients that go into it...flour,ghee and sugar...not really the healthiest in the world ;D
As a child my memories of soanpapdi are of a glass bell jar filled with a fairy gossamer white strands,on a cart,pushed by a man who had a rather large sounding bell with a very pleasant ring...you knew that the soanpapdi man was on his way !Unfortunately nowadays one only gets to see the soanpapdi that is pressed in squares and mixed with a variety of dry fruits...rarely do we see it in loose form...but there are people who still do come home and make on order, these fine strands of soanpapdi which recently the western world refers to as Fairy floss...an apt name I think....makes it even more endearing for a child. Chefs from all over the world like to use it as a topping for so many desserts and it looks so pretty and adds such a beautiful finishing touch touch...and they add colour to it to match their gourmet creations...the end result is visually stunning !!!
 In the picture you can see both versions ,one is a bournvita flavoured soanpapdi and the next is the plain one...rolled into a ball for ease in serving and transporting...both are delicious,though I am partial to the Fairy Floss !!! ;))
  
Ingredients
 1 ½ cups Besan (Gram Flour) 
1 ¼ cups Maida (Flour) 
2 tbsps Milk 
1 cup Sugar 
250 gms Ghee 
Chopped pista/badam (optional) -1/4 c 
Saffron/Cardomom powder (optional)
Method:  
Mix together the besan and the maida together
Take a heavy saucepan and heat the ghee inside this pan.
Add the maida and roast on low heat until it is golden in color.
Cool a little and keep stirring occasionally.
Make syrup of sugar, water, milk and saffron strands.
Pour this sugar syrup into the maida mixture.
Beat it well with a large fork until the mixture makes thread like flakes.
If you like to leave it at this stage,in it's loose form...the next steps are not necessary.(just seal in an airtight container)
Transfer all the mixture into a greased surface and then roll it into one inch thickness.
Cut the flattened mixture into one inch squares when cool.
Wrap all the pieces separately in butter paper packets.
Store the soan papdis in a sealed container.


Saturday, 19 October 2013

Meringues

Meringues always reminded me of clouds...as a child I was convinced that it was indeed magical fingers that managed to produce these light airy confections...always confused between meringues and the macaroons so famous in Sivakasi and Tirupur...I now as an adult know the difference between the two !!!
Macaroons for us as children were always referred to as Tirupur biscuit ,I was amazed to learn recently that a few of my friends had fond memories of the'tirupur biscuit'...brought to us by a doting family from Tirupur and thus having earned the name !!!
I guess there began our fondness for egg white confectionery...be it meringues,macaroons,nougats...we loved it all ! I was so excited the first time I successfully baked my meringues...one would've thought I'd won gold at the Olympics....boy was I happy !!!! That happiness however paled in comparison to the pure joy expressed by the kids,their friends and my mom after taking their first bite....no wonder I keep experimenting...wonderful to pass on food tales to the next generation ! Do try the meringue recipe and smile as much as I did ;)))))))
Meringues
 Egg whites 3
Castor sugar-220 gms
Vanilla essence-2 tsp- I prefer to use as i don't like them smelling eggy !!!!
Food processor....you can try with a hand beater.
Method
Heat oven to 180 degrees
Add the egg whites to a clean stainless steel bowl...make sure the bowl is clean and dry and also that there is no yolk in the egg whites.
Beat the egg whites until they are a thick white cloud and form soft peaks,when lifted with a whisk
Then as you continue beating,add the sugar gradually tsp by tsp until it's all added.
You will now find that it's changed to a glossy white rather than a frothy white...beautiful !
Now gently fold in the vanilla by hand,very gently.
You can spoon onto a tray lined with grease proof paper or like I do...dollop into muffin cups...easy to serve..no mess !!!
Put them into the oven and turn the temp down to 160 degrees
After 15-20 mts ,you will see that they have turned matt ...let them bake until you see a crack forming
Now,turn off the oven and let them dry out in the warm oven for a half an hour or 40 mts
What this does,it keeps the outside crisp and the inside a bit chewy and almost hollow...airy fairy like :D
Looks quite delicious doesn't it....and it's just a tiny tsp of egg white and sugar/meringue ! Fantastic !
 And now you see what damage little hands can do...with strawberries and chocolate and meringue !!!! Sighhhh....I try...I really do ;P ...meringues topped with stewed fruit and cream is a great dessert !!!

On the 21st of Dec...I was asked by my friend and fello foodie to enter a baking contest which I gladly accepted...not knowing,until later,her brief,that it had to be a tad creative...now that posed a bit of a problem as the one thing I did not have on my hands that day was time !!!! I'm sharing this with you,because thanks to her,I managed to put up something that made everyone smile and I even won a prize for it...reminds me of a saying..."where there is a will there is a way" and my will was simply to do justice to her contest !!!
Santa's magic Winterland
So Santa's Magic Winter land comprised of meringue mountains...strawberry santas who turned blue because i forgot to keep aside some white butter cream frosting...well !!!! No ! actually the Santas were a tad cold!!!  you see ...no one knits Santa a sweater ;P Anyways...it was a lot of fun !!!!


The one thing that a food blogger like me,looks forward to are feedback from my readers...I recently received some photos of this meringue recipe tried by a reader...I do need to share them with you !!!
you can see that she enjoyed making them simply by the way they've been photographed and presented ! Looking forward to hearing from many of you as well !!!
Meringue recipe tried by Priya Satish

Priya's PLT meringues

Friday, 18 October 2013

Shakarpara

After being very good at not allowing temptation to come in the way of sampling the pre Diwali sweets...and I was super proud of myself too and then BHAM !!!...these tempting morsels arrived at my doorstep and I was like a kid in a candy store...haven't eaten Shakarapara in years...not sure if my kids remember eating it at all...well !!!...they're in for a feast now,that's for sure ! Crispy ,light (in texture only) ,that first bite leaves you with a thin coating of powdered sugar on the upper lip to quickly lick away...oh my goodness...the simplest things in life bring the most joy and that in turn brings out the very child in you ! Again,it's amazing how food can transport you to happy times and bring with it a host of other memories tucked away deep in your mind...I am thankful that I can share this with you :)))
 This recipe is from a book ,I believe it is a foolproof recipe...do try and let yourself feel like a kid again,even if it's just one bite !!!
 Ingredients:


All-purpose flour - 500 gms
Ghee - 100 gms
Baking powder - 11/2 tsp
Water to knead
Oil for frying

For the coating -
Sugar - 300 gms
Water - 100 ml


How to make shakarpara:
  • Sieve the flour and then add ghee to it. Mix the mixture till it resembles breadcrumbs.
  • Add the baking powder and then with the help of water knead it into a stiff dough.
  • Cover it with a damp cloth for 10-15 min.
  • Heat oil in a kadai. Divide the dough into three long rolls.
  • Roll each portion to 1/2 inch thickness and cut with knife into 1/2 inch pieces.
  • When the oil gets perfect hot fry the pieces on medium flame for 10-12 minutes or till the pare are crisp and light golden.
  • Drain them on a paper tissue and fry the remaining pieces in the same way.
  • To make the syrup (coating)
  • In a pan boil the water and the sugar till it reaches one-string consistency
  • Remove from fire, add the pare all together and coat the pare evenly with the help of a flat spoon.
  • Do not mix too much, as the sugar will harden.
  • Take them out and let them dry for a while.
  • Store in airtight container.


Sunday, 13 October 2013

Barnyard cuppycakes


Cooking for children and their friends is a different kind of pleasure altogether !!!! While I always say that all it takes is a little bit of planning ahead and sorting out ideas of what you want to cook,while keeping it healthy...and that usually works out great ! But...every once in awhile little things happen that amaze you and keeps you wanting to do better than what you think your best is ;)) !!! That's what happened with these little cuppycakes of mine...oh,don't get me wrong ,I was definitely planning on "cute" but in a completely different way,was going to do a butter cream frosting and I have little black ,brown and white cow sprinkles to finish with...or so I thought !!!! It was the mini marshmallows that got me started and I amazed myself with what could be achieved and believe you me ...I ain't no artist...nope!!!!...that gene skipped me completely..LOL !
All you,need to do this is a couple of hours...well worth it...I think and a bit of imagination...I abhor fiddly work,so if I could do it,you most certainly can...what's the worst that's gonna happen?!!?...you can still eat the cupcake  ;D
This is a simple water icing...
For a 100gms of icing sugar add about 5ml of hot water...makes a fairly thick frosting...if you are using a liquid food colour instead of a gel,all you need to do is add a bit more icing sugar to make it thicker...it's a very simple icing...to increase the quantity,just add the amount of icing sugar and water and adjust the two ingredients accordingly...you need to stir it in quick motions for it not to be lumpy !
And a small palette knife and toothpick is all you need to do the faces...if you don't find mini marshmallows...cut the regular ones into 4 pieces with kitchen scissors,thoroughly washed and dried before cutting !  

Friday, 27 September 2013

Triple chocolate muffins

These were such a joy to make...recipe courtesy Mr.George Calombaris of Master Chef Australia fame....I have made a few alterations,due to unavailability of ingredients...i would also suggest trying these out with a wholegrain flour...I plan to do that soon,however if you beat me to it,do let me know...this takes an hour from start to finish and I have added a few extra steps for the novice baker...just that sometimes a heavy cake can turn out to be such a disappointment after all that hard work and precise measuring...would definitely make me not very chipper,if that were to happen to me ;))
Ingredients
Self raising flour 1 1/4 C
Oil 1/2 C
Milk 1 C
Eggs 2
Vanilla essence- 2 tsp (he suggests 1)
Dark Chocolate couverture 100 gms /Bournville dark chocolate/ Cadbury silk... cut into squares and refrigerate until use
Soft brown sugar 3/4 C...you could use 1 C too
Cocoa powder 1/2 C
12 white chocolate balls / marshmallows were used in the pic ;p
The triple choc is the cocoa,dark choc and white choc...feel free to play around with this recipe :))
Method:
Pre heat the oven to 200 C/ gas mark 4
Sift together the flour and cocoa
Mix in the sugar...set it aside
Now whisk together lightly in another bowl the milk,oil,eggs and vanilla
Make a well in the dry ingredients and pour in the milk mixture
Now,this is where you need to add that special ingredient...love...fold in gently and patiently,thinking of the person you are making it for :)...do not beat...this will take a few minutes of folding until you get a smooth consistency...it's worth it !
Now add the chocolate couverture or cold chocolate squares ad mix in
Line the muffin trays with the paper cups
Spoon in the mixture about half way,add the white chocolate ball/marshmallow and top with some more of the batter
Bake in the oven for about 12-15 mts or until a skewer inserted comes out clean
Let cool and serve
The original recipe says 12 muffins but I got 14 out of this quantity !

Sunday, 8 September 2013

Bumble bee cupcakes

These cupcakes were an absolute joy to make,which is probably why they turned out looking the way they did !!!! It's just a basic vanilla sponge cake batter...and the frosting is a simple hot water and icing sugar frosting,for a 100g icing sugar ,you need a Tbsp of hot water,just stir it in ,if it's too thick ,add water a teeny bit at a time,too runny,add icing sugar,no fail ! Add the yellow food colouring for three fourth of the mix and black food colouring for the remaining quarter...using a small palette knife and with a big smile ,apply the yellow icing on each cupcake and let dry...using a toothpick dipped in the black icing,draw lines and eyes to depict the little buzzing bug...mouth and expressions are other options too,have fun with it...it takes an hour for 80 cupcakes...that's not too bad :))

Saturday, 7 September 2013

Hokey Pokey

This recipe was originally made with golden syrup...we all don't happen to have golden syrup sitting around in our pantry do we ?! ...so I thought why not try some honey instead,same consistency,colour,ummmm...sounds healthier !!! And it worked...was super happy,hope u will be too !
Now i have modified slightly from Nigella's recipe and cut down the use of bi carb ...so if you do see her recipe ,you will find that difference !
Ingridients
Castor sugar 100g
Honey /golden syrup-4Tbsps
Soda bi carb-1 tsp
Whisk
Baking parchment or greased foil paper
Method:
Keep the bi carb and whisk ready.
Keep the greased paper ready on a plate
Put the sugar and honey in a pan
Stir it together before putting it on the hob
Do not stir after heat is applied
Turn on flame to slow,once the sugar starts melting,gently swirl it around
Continue to watch like a hawk until the mixture turns to a golden caramel/dark maple syrup colour
Switch off fire.
Immediately add the bicarb and whisk in circles vigorously,the mixture will billow like a golden cloud
Quickly turn it over on the greased foil before it starts to harden...this should be done in one fluid motion
You will get a cloud of pale gold foam like you see in the pic
Let cool in the refrigerator or in a cool place for about 20-25 minutes
Once hard ,break into pieces and store in an airtight tin.
This can also be used as a crumble topping for ice cream :)

Hokey pokey

Kitchen Alchemy..you do feel.like a mad food scientist...loads of fun..that's what making Hokey Pokey is all about,super easy,interesting to look at and 10 0ut 0f 10 people love it !!! That's a definite winner and an absolutely must try recipe ! So...must try and must give feed back :))) Crunchy honeycomb is the best way to describe it ! I first watched Nigella make it and have been wanting to try....made it today in honour of a little bumble bee who turned 4 ;)) and most of the mommy and baby bees seemed to love it too...think they were quite buzzed with it !Lol !