Wednesday, 29 January 2014

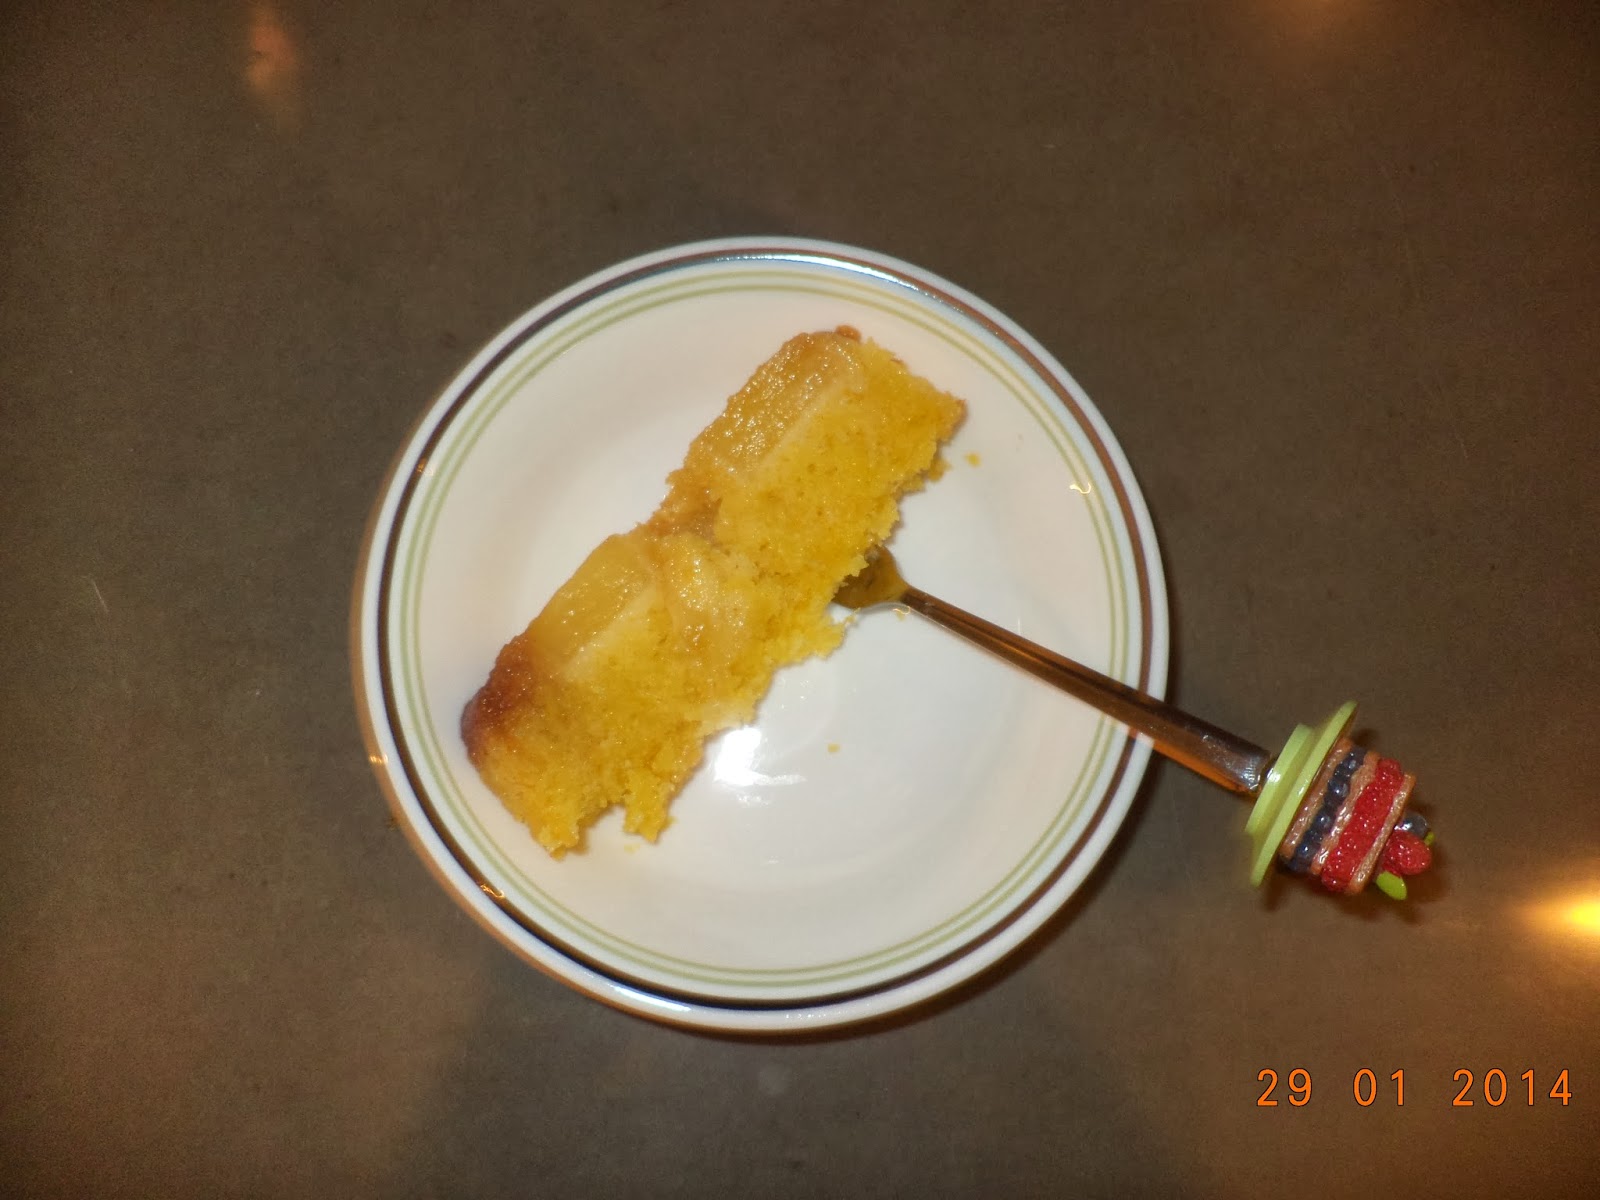
Pineapple upside down cake with quinoa

A recent request by a good friend for a recipe ,for a Pineapple upside down cake,got me thinking on how long it's been since I've made one of these !!!!!! You know how it is ,as you cook and try out a lot of different things ,the time tested recipes sometimes take a back seat .My family has been making noises of wanting this cake but they've been 'small' noises so I haven't really paid heed to them !!! Not very nice ,I know ;)) While most cakes are a joy to make this one is definitely a delight as you anticipate the perfect upside down cake after it 's baked...while laying down the pineapple rings in a pattern !
 !
 After I got out the recipe ,it got me thinking if I could possibly use this recipe in an experiment towards making healthier cakes...and sometimes when the thought is so overwhelming,you need to get to it right away and the one thing I had on hand was a packet of organic Quinoa...while I am more in favour of Indian millets,I thought this would be a good ingredient to start with....plus I was a tad lazy to go and shop !
Organic Quinoa

Quinoa powdered

This recipe makes 1 round 20cm cake but if you are like me and just have to share what you make (my family will tell you ,that it's a disease )...then you can divide the batter like I did into 2 loaf tins,medium and small...this way ,you get to make so many people happy,which is the reason why I cook, most of the time anyway ! Though this recipe calls for glace' cherries,I however am not a fan so I haven't used them.I'm sharing this recipe because everyone did enjoy it immensely,I was a bit apprehensive because of the graininess of the Quinoa but thankfully I only added about 25% of it  to flour,the next time I will try adding a bit more !
Pineapple upside down cake

Recipe for a Pineapple Upside down cake with quinoa
40g self raising flour
20g whole grain flour
20g quinoa
125g soft butter
100g Castor sugar
3 Tbsp brown sugar
2 eggs
2 glace' cherries halved
2 Tbsp pineapple juice
1/2 tsp baking powder
lemon rind-1 lemon
Method
After measuring out the quinoa...blend it to a fine powder and set aside
Generously grease the preferred cake tin/tins with butter or oil.
Sprinkle the brown sugar on the base of the tin and arrange the pineapple rings on the top...place a cherry half in the centre of each pineapple ring.
Sieve together the quinoa,flours and baking powder and set aside
Pre heat the oven to 180 degrees C
Beat the butter and sugar until fluffy
Add the eggs and beat 1 at a time
Add the lemon rind and beat
Fold in the flour /quinoa mixture
Mix in the pineapple juice.
Ladle the batter over the pineapple slices and smooth the top
Bake in a moderate oven for 30 mts ,until a skewer inserted comes out clean.
Let cool for about 20 mts before turning it out onto a plate .
Medium sized Pineapple upside down loaf cake

Moist and soft

A yummy slice :)


Tuesday, 28 January 2014

Pomegranate

As a child ,the Pomegranate was one fruit that I just did not want to eat....it took too long to chew you see...that meant less time for play or other more interesting stuff than eating fruit !!! Today it tops the list of my favourite fruits,I can almost feel the enrichment to my body as I swallow each mouth full and I am on a mission to pass that onto the kids in my family as well ! A bowl of crunchy pomegranate seeds bursting with juice and sweetness really uplifts the spirits,the first thing in the morning !

The easiest way to peel a Pomegranate
This was taught to me by a sweet lady called Regina,who has been a part of our household for many years...until recently I thought it was only me who did not know the nuances of peeling this fruit then I realised that many others were also reverting to the way I was used to earlier, that of cutting the fruit in half and taking it apart....this is far easier and quicker !!!
 1.Wash and wipe the outside of the fruit
2.Using a sharp fruit knife make ,vertical  shallow gashes on the surface ,on the skin
3.Place it down and cut off the crown
4.Once the crown is removed,the long gashes will become vertical segments that can be just pulled apart
5.That way ,the rest of the fruit can be stored intact,if not eaten.
6.This also offers great ease to pull out the seeds as more sides are exposed !
Vertical shallow gashes

Pulling the segments apart

A bowl of ripe ,delicious fruit !

This fruit is among the super foods and every human being will greatly benefit by eating 1 tablespoon,at least, of pomegranate everyday !

Health benefits of eating Pomegranate

They have more antioxidants than acai berry juice or green tea !
They contain hefty doses of Vitamins C,K and B...very essential for bone health and it helps the body to metabolise proteins,carbs and fats !
It has very little fat and contains no cholesterol...high in dietary fibre and even recommended in small doses for diabetics.
They have immense anti ageing properties as they promote cellular regeneration ,so think youthful skin ,hair...

All in all ,it eliminates free radicals (antioxidant!) ,promotes bone health (osteo arthritis) protects cardiovascular health, cures anaemia (iron content),boosts digestive conditions,stimulates appetite,promotes blood circulation and is a highly recommended for cancer prevention !!!!

If you don't like the taste,start eating a little bit ,you will definitely accquire a taste for  it...beats the alternative of taking medication later on...right ?!! All these super foods that are available to us throughout the year like pomegranate,drumstick (leaves and veg),curry leaves  etc...it's time we re-introduced them into our diet with a purpose,that of wellness ! Think about it and reap the benefits of healthy food choices !
 

Monday, 27 January 2014

Green chutney double fry

Most Indians love a spicy breakfast,while we do relish the oatmeal , bagel ,preserves etc...most of us would rarely say no to a hot savoury/spicy breakfast !Some months ago when the BBC good food India magazine was first launched,they had mentioned this dish on one of their covers,it looked and sounded very interesting and yet simple...just 'my' kind of recipe ! I did make it then a few times for breakfast and my family absolutely loved it,it was such a wonderful idea of combining two very common breakfast ingredients,green chutney and fried eggs !!!! I wondered why I hadn't thought of it before... and to my surprise,not too many people that I knew, had thought of it either !

Well...anyway,like it happens sometimes,the recipe just kinda slipped from my mind,until a few days ago when my kids reminded me of 'that green fried egg' that I used to make...Lol !...I was rather amazed how I could've so easily forgotten such a simple but delicious recipe...but then again,my blog did not exist way back then... ;))...so ,that's my excuse ;p...Since I was reminded, on a busy week day morning,I really did not bother looking for that exact recipe,I just quickly put together what I thought went into it...They loved it but I will also give you the original recipe ,nevertheless ! The freshness of the green chutney is so perfect with the richness of the egg,it just adds that perfect zing to an otherwise mundane breakfast of fried eggs ,not to mention so much healthier with the addition of herbs and ginger and garlic !


On toast ...some like it like that ;)

This was how I made it a few days ago !

Recipe for green chutney double fry-serves 2
Eggs-2
Garlic-1 tiny clove
Coriander leaves-1/2 C
Mint leaves-1/2 C
Green chili-1/2 de-seeded (optional,u can leave it whole)
Salt and freshly cracked black pepper
EVOO (Extra virgin olive oil)-1/2 Tbsp
Method
Blend the garlic,chili and herbs together with a little bit of water to make a smooth paste
In a flat non stick griddle add a bit of EVOO,on low heat
Add the green chutney,add salt and let cook v slightly
Break the eggs carefully on the chutney...add a light sprinkling of salt on the top and freshly cracked pepper
Cover with a lid and let cook to your liking...my family likes the whites just set and the yolks oozy (covering with a lid makes the eggs cook faster,very essential on a week day morning !!!!)
Serve with some toast...to mop up the oozy yolk along with the yummy chutney !

I love the way the edges of the egg are all crinkly with a border of the green chutney,the flavours are just perfect,the herbs make sure that there is no hint of garlic on the breath and get you feeling all energised to kick start your day ! And with these flavours,the possibilities are many...do try and keep those comments coming folks !!!!!!!!!

The original recipe had no mint,asked for 8 eggs for 1 Tbsp of chutney(1 Cup of coriander leaves) and contained a half inch piece of ginger,5 green chillies and the serving suggestion was,hot buttered Pav bread ! Yummy Yum !

Thursday, 23 January 2014

Coffee cake

Cake...just hearing the word makes you want to eat a slice ! Anyone who denies wanting to eat a slice of home made cake is not being entirely honest with themselves,I think!!!!...apologies if I'm wrong ;)) ! Chocolate ,vanilla ,lemon , orange,pear,coffee,walnut,blueberry, pistachio,carrot,honey,ginger.....the list is truly endless ! There is nothing more welcoming to a guest or a child coming home from school,than the sight of a freshly baked cake...give me a slice of home made cake any day rather than the creamy store bought confections !
You also have the option of making it healthier,think jaggery,whole grain flours,oil,buttermilk....so much healthier without altering the taste !
After being asked for this recipe, numerous times and getting a lot of oohs and aahs over this coffee cake,I thought why not share this recipe with you...it is quite quick to make and is lovely to have at tea time or it can be dressed up and made more luscious for a special occasion...and you can reduce the amount of coffee,if you'd like it milder ! There are a lot of coffee lovers in my family,the last time I made this cake,Nov 2013(the date on the camera is inaccurate :p),I used chocolate covered roasted coffee beans as a topping(sourced abroad) and they were such a hit ! So,if you manage to chance upon white ,dark and milk chocolate coated coffee beans,do pick up some...they're yummy !!!
Coffee cake with chocolate covered roasted coffee beans
Recipe for Coffee cake
170 g butter at room temp
140g Castor sugar
3 eggs
140 g self raising flour
2 1/2 tsp instant coffee granules dissolved in 1 Tbsp hot water
Method
Pre heat the oven to 180 degrees C
Grease and line two 20cm tins or one 23cm round tin with grease proof paper
Beat the butter and sugar until light and fluffy
Add the eggs and beat well
Sift the flour into the bowl and fold in,do not mix
Fold in the coffee
Pour the batter into the prepared tins/tin
Bake for 25-30 mts until a skewer inserted in the middle of the cake comes out clean.
Cool on rack
Coffee frosting (optional)
95g soft butter
125g icing sugar
2 tsp coffee granules dissolved in 2 Tbsp of hot milk
-Beat butter until fluffy,add sugar and beat,add the coffee mixture and beat until smooth and spreadable.
With a palette knife or spatula spread in a swirling motion.
This recipe is to sandwich both halves,as well as to spread on the top...so if you happen to make just one big cake,the left over frosting can be refrigerated and used to make cake pops....just a suggestion !
You can decorate with spun sugar, caramelised walnuts, chocolate coated coffee beans or maybe just chocolate chips...a perfect 'guy' cake...for a Dad, brother ,husband,son,cousin.....:))) LET THEM EAT CAKE !!!!

Sunday, 19 January 2014

Fish with orange and chilli

Simple recipes that are quick to make and contain healthy ,wholesome,natural ingredients are exactly the kind of recipes that I keep going back to again and again. The satisfaction of cooking a delicious meal that looks spectacular but involves very little fuss by way of a cooking process or in terms of prep,is what every home cook would like to add to their repertoire !!!! It gives you the time to spend with family as well as allowing you the time to put together a nutritious meal ....enjoying the meal with your loved ones is every bit as important as cooking it...so this one is not only for the lucky tasters but also for the cook :)) I do know a lot of my 'un' -veg friends ;)) who will love this recipe...apologies to my veggie readers !!!

The fish that I use is usually a seer fish,which I ask the fish monger to fillet,this time I have used a basa fillet,as the texture lends itself beautifully to the marination required as well as the baking !A flaky ,melt in the mouth texture is what all sea food lovers would want to taste while looking forward to tasting a baked fish dish !

This dish is simple enough to make in large quantities for a party....the only thing you need to remember is that it needs to be served hot,so when you have an understanding (;P) bunch of foodie friends over,this is a no fail dish !!!!

While talking about seafood,I would also like to introduce you to the idea of using a food detoxifier,I have been using it for 2 years now and I can honestly say that it makes a huge difference in the quality of produce that you are eating,my family has definitely had far less or almost nil instances of falling ill after we have begun using the food detoxifier !It is very common in Asia...here in India it is manufactured by Kent,as well as a company called Fariday Ozone(9942933449),based in Coimbatore...do check it out ! An unimaginable amount of toxins come out from all seafood,meat and poultry and sometimes from the fruit and veg as well !

Fish with Orange and Chilli

Recipe
Fish fillets-1 1/2 kg
 Ripe Red chillies-8-10 chopped fine
Garlic-4 cloves chopped fine
Ginger-1" piece chopped fine
Orange rind-1 Tbsp
Juice of one orange
Soy sauce-1 C
Honey- 1 Tbsp
Rice wine vinegar-1/4 C (you can also use white wine vinegar)
Olive oil-1/4 C
Method
Rub the fish fillets with the ginger,garlic and half of the orange rind
Add the Olive oil and set aside for 30 mts
Now transfer to a baking dish
Heat  the oven to 200 degrees C
Mix well together, the honey,soy and vinegar
Pour the mix over the fish
Add the chillies and the remaining orange rind on the top...cover the top with a lid or with foil
Bake for about 20 mts and check,if the thickest part of the fish is cooked,by poking with a skewer...it should flake easily,if not leave it for a bit longer.
When done ,serve hot !
NOTE : My family did feel this dish could've used a bit of salt...I leave that up to you !


Serving suggestions-I served this with some brown rice tossed with spring onions and a purple cabbage salad.


Thursday, 16 January 2014

Sugarcane

The harvest festival ,does bring with it many treasured memories of time spent together as family....these memories include one in particular ,that of enjoying the time spent talking, with a big bowl of sugarcane pieces....to my mind nothing else can compare,at this time, to the taste of crunching on fresh sugarcane and being rewarded by your mouth filling up with the yummy juice which has just the right amount of sweetness ,that is never overpowering !!! A taste that is enriched only by sharing the experience with family,especially children...crunch on a piece of sugarcane and the smiles will reach your eyes,no matter how old you are !!! It's available now in the market,you should definitely take advantage of that and bring home that treat to savour,I doubt very much that you would regret it :)))
 Now for some nutritional information that I'm sure many of us had little knowledge about...
1.Chewing sugarcane,helps to strengthen your gums,keeps the teeth and mouth clean,removes odour causing bacteria.
2.It's very good in the treatment of jaundice and liver related disorders !
3.In the 2008 journal of food chemistry,sugarcane was found to have terrific antioxidant properties ,it has the ability to scavenge free radicals and plays a protective role against radiation induced DNA damage.
4.It boosts the body's immunity and is known to fight common viral infections like the flu and common cold.
5.It contains only 15% sugar while the rest is water and a rich source of vitamins and minerals including calcium and iron,magnesium and zinc,Vitamins A,B1,B2,B3,B5 and B6...which help in the slow absorption of sugars into the body,thereby helping one maintain a healthy body metabolism
6.In the summer months,it works well to ward off dehydration.
7.It's only when it is processed and converted to white sugar,does it refrain from being healthy !
8.While the juice is beneficial,if you can,chewing the pieces has far greater benefits !
Let us take time to give our body seasonal nutrients which can only help bring about fitness for mind,body and soul !
I know what the snack of choice is going to be at our home during this season...one option is definitely the succulent morsels of sugarcane,how about you ?

Monday, 13 January 2014

Pongal

Pongal-the harvest festival that carries with it so much significance ! A ritual celebrated to give thanks to the land ,the Sun that is responsible for nurturing the crops ,the cows,the bulls which are so important to the farmer in many ways and provides us with our daily nourishment...gratitude for all this and for the grains that are stored in our home,which provide us food for the rest of the year...this is what Pongal is all about ! There are many harvest festivals celebrated all over the country in Punjab, Assam,Andhra Pradesh etc and around the world as well, in many countries !
The festival consists of more than just an offering of sweet rice to the Sun and other deities...it also signifies the beginning of a new month in the Sanskrit calendar...the practice of tying mango leaves over your front door or the act of drawing kolams (designs) on the ground with rice flour actually signify a particular purpose or intent !

The mango leaves contain anti-bacterial properties and when they are tied over the front door...the breeze wafting in carries these properties in and keeps the home free from certain household pests/insects ....the kolams made with rice flour on the ground in front of the home,provides food for ants,so they will not feel the need to come inside the home looking for sustenance...unfortunately sometimes,paint is used or a chemical powder is used to draw the kolams and this negates the purpose of it all !!!

 The experience of cooking pongal out in the open with firewood and brass and mud pots is something I have treasured from childhood and something that I hope to pass on to the next generation.Going through the same motions year after year puts one in a state of contentment and calm joy,thinking of all the family and friends that have shared this day with me in the past ! Blessings from my home to yours !
One pot is a 'kalkandu pongal' sweet rice with white rock candy,the other pot is rice and jaggery and the last one is with rice,jaggery and yellow lentils :)) ,all unique in their own way and taste extra special on this day,for sure !!!!
Recipe for a simple pongal
Rice-1 and1/2 C
Jaggery syrup-3 C (3 cups jaggery and 1/2 a cup of water...on a gentle simmer until it turns into a thick syrup)
Ghee-2 Tbsp 
Saffron strands-a few
Cashewnuts-2 Tbsp ,fried in a bit of ghee
Raisins-1/4 C-fried in a small bit of ghee
Water -3 C
Method
Soak the rice and wash it well a few times with water
Drain some of the water and set aside
In a pot,add some of the water left from washing the rice and the 3 cups of water and let it come to a boil on the stove.
Once it comes to a rolling boil,add the rice grains and stir
Keep stirring once in a while until the rice is well cooked,the grains should be soft and squishy
Now add the jaggery syrup and ghee and mix well,turn the fire on low or turn it off,make sure,most of the water has been absorbed....the residual heat in the pot will bring the flavours together.
Add the fried cashewnuts and raisins and mix well.Mix in the saffron stands. Serve hot.

Note: Do use the darkest organic jaggery you can find,it really does make a huge difference in flavour...since we are not big fans of cardamom in pongal we refrain from using it...most people do add it to the pongal. I do however recommend you try cooking it in a terracotta pot,at least once !


Variation-to make the white pongal,instead of the jaggery,use 3C of powdered white rock candy and half a cup of milk after the rice is cooked !

Wishing you all peace,prosperity and joy in your home always ! Happy Pongal !


Peas and Paneer

I have a friend who always argues with me about authenticity when I try and alter recipes to make them healthier and lighter (in terms of calories) while still trying to retain the flavour !!! Keeping her in mind,I refrain from calling this dish 'Mattar Paneer'...as it does not contain the usual ingredients that the name evokes...but it's a tried and tested family favourite,so I share with you...whatever you may want to call it,is fine with me !!! :))

The combination of the tomatoes works so well with the sweetness of fresh peas set off by the richness of the cottage cheese...I do at times,refrain from lightly browning the paneer and add them in as is,that doesn't alter the taste of the gravy in any way...but while posting pictures on the blog...golden cubes of paneer do look more delicious ;)))

Serve this with hot rotis or a simple spiced pulao...for those single people living and working abroad...who are way too tired to make rotis in the eve...make this over the weekend,it goes well with crusty breads too !!!
sweet peas-boiled

Lightly fried cubes of paneer

Light and yummy Peas and Paneer gravy

Recipe-serves 4
Paneer-180 g-cubed
Peas-cooked 200g
Tomatoes-8 ripe
Onions-2 big
Ginger-1/4 inch piece-peeled and chopped
Garlic-2 cloves
Cinnamon-a small bit
Green chillies-3 or 4 -slit and de-seeded(optional)
Coriander leaves-2 Tbsp-chopped fine
chili powder,turmeric powder,salt,oil
Method
Add the tomatoes,onion,ginger and garlic to a pot,add water and let it come to a boil,leave it to simmer for 5 mts ,then set it aside to cool.
Once cooled,blend it with the cinnamon to a puree' and strain.
In a non stick pan...add a tbsp of oil and lightly fry the paneer cubes,a few at a time,without over crowding the pan,the paneer tends to stick and splutter,so take your time...this is entirely optional !
Set aside.
Keep the cooked peas aside...if you are using cooked,frozen peas,you can add them directly when the gravy is boiling away.
In a pan,heat a tsp of oil,add the green chillies, the tomato puree' and stir,add half a cup of water,the chili powder,turmeric powder and salt and let it come to a boil...after about 8 minutes,check for seasoning...add a bit of sugar/jaggery if the tomatoes are very sour.
Once the puree' is well cooked and the aroma arises another 6 mts or so,add in the paneer cubes,the peas and the coriander leaves.
Check again for seasoning and cook until required consistency....some prefer their gravies fairly thick !
This recipe is quite versatile ,so feel free to add your own twist to it !!!

Saturday, 11 January 2014

Heart healthy concoction

I find that when one pursues their passion with the intention of sharing and learning,we do happen to stumble upon information from the most unexpected of sources...information and knowledge that may save a life and also make a difference to many lives ! Being interested in various cuisines and flavours and new food experiences is one part of being a foodie,the other part is being aware of the healing and nutritive powers of food.The world has been blessed with an abundance source of nutrients and medicines,most of them available in our own kitchens...it's just that in our busy daily existence ,people find it a lot simpler and easier to pop a pill rather than spend time like our elders did in brewing up different elixirs and 'kashayams' (blends) for various ailments that may come our way !

Recently I was given this recipe by a relative who found that after taking a spoon full of this every morning prior to eating breakfast....being a heart patient...a month later ,he found himself fitter than before and that included climbing the stairs with complete ease and enjoying his daily walks with vigour...soon after ,I happened to speak to a friend who had problems with her cholesterol levels and once she began to drink a spoon full of this, very quickly her levels were normal...apparently this recipe has been going around face book and twitter and is good for anyone without ailments too to have a spoon full every morning...how can it not be??!!! it contains,ginger,garlic ,lime,honey  and apple cider vinegar and I must say,it doesn't taste bad at all !!!! What's the harm...shake the lethargy out and give it a go !!!
Recipe
1 C ginger juice (200g ginger and half a cup of water,blend and strain)
1C garlic juice(150 g garlic and half a cup of water,blend and strain)
1C lime juice (about 10 limes/lemons-Indian limes)
1C apple cider vinegar
3C natural honey
Method
Add the ginger juice,garlic juice,lime juice and apple cider vinegar to a medium sized pan.
Put on a slow fire,after it comes to a boil,leave it on a on a gentle simmer.
This mixture is about 4Cups,u need to reduce it down to 3 cups...this will take about 45-60mts on a slow simmer.
Once it's reduced...set it aside to cool.
Now add the honey and mix in well.
Store in sterile glass bottles and refrigerate.
You need to have 1 Tbsp before breakfast ...and don't worry about garlic breath,the lime and vinegar cut that out !!! ;))

Thursday, 9 January 2014

Pol Sambol

Sambols are a part of every Sri Lankan meal much like our chutneys and pickles...they add a lot of flavour and zing to a meal...Sambols are so versatile,they are eaten at breakfast ,lunch and dinner.They are quick to make and contain only a few ingredients,I think once you taste them you will think of a number of other dishes ,from various other cuisines to which the flavours of these Sambols can be easily adapted ! It definitely does appeal to the Indian palate ! This recipe of Pol Sambol,can be made and served along with the milk rice and dhal curry that was mentioned in my earlier post....YUM...just thinking of the delicious flavours is enough to get my taste buds working overtime :)))...please do try and do leave your comments,it really does help for me to know if your kitchen benefits from these recipes !
While some coconut Sambols contain Maldive fish,this one is a vegetarian version and tastes equally good !
Pol Sambol
Recipe for Pol Sambol
1 small coconut
1 red onion -very finely chopped
juice of 2 limes
red chilli powder or fine chilli flakes-1-2 Tbsp
 rock salt-a pinch
Method
Break the coconut in half...pour out the water and grate it .
With a mortar and pestle pound the onion,chilli and half the lime juice with a bit of coarse salt (you could also use a blender)
The paste should be red in colour
Add it to the grated coconut and toss together by fingers or with forks
Taste and add some more lime juice/chilli powder
Serve fresh with string hoppers or milk rice and dhal.
After the meal,when the flavours linger in your mouth,remember to smile and let me know if this was one of the yummiest combos ever !!!!!

Wednesday, 8 January 2014

SriLanka on a plate

The island nation that is so close to home ,that feels like home but is yet so different , unique and beautiful...Sri Lanka ! Visiting a country where the people are so familiar and hospitable...makes for the perfect getaway...adding to that, is the charm of a culture very prevalent even today while simultaneously embracing modern thinking ! The mouthwatering food that is so similar to our own Indian cuisine and yet manages to surprise and excite the taste buds with it's own special flavours and fragrances,keeps the visitor waiting to return to savour it again ! However number of times one visits this country,it still never ceases to amaze us by the sheer cleanliness , respect shown to visitors,the vibrant Tuk Tuks (my favourite!!!)
and unimaginable vistas....you can tell,I thoroughly enjoyed my trip and I bring with me ,some very simple recipes to share with you and help you put together an authentic SriLankan meal at home !
A simple vegetarian Sri Lankan meal
Milk rice
Sri Lankan Dhal
served with coconut sambol/chilli sambol
Very comforting and very satisfying...what more does one want ?!!
The Tuk Tuk :))))

milk rice

Sambols

SriLankan dhal and Fish curry

Recipe for milk rice
250g brown/white rice
11/2 cups of water
A pinch of salt
1/2 cup of coconut milk
Method
Wash the rice well and transfer it to a medium sized cooking vessel
Add the water and salt and cover and cook on low heat until the rice is soft and plump and all the water is absorbed.
You may alternatively cook the rice in the rice cooker and then transfer to a vessel before adding the milk
Now,with the heat on very low,add the coconut milk and stir it in with a spoon
Let it cook on a very slow simmer for 10mts...check seasoning,add a bit more salt if necessary !
If it cooks too fast,the texture will not be right and the rice may burn
Once it is creamy,take off the heat and let cool a bit
Grease a baking dish and press the rice onto it and flatten well with the back of a spoon
Score a square or diamond pattern on the surface of the rice
Once it has cooled and stiffened,cut with a knife and place the squares onto a serving plate
Serve with warm dhal or fish curry with sambols as an accompaniment.
Sri Lankan dhal curry
1 cup red lentils (masoor dhal)
1 onion sliced
3 green chillies
turmeric powder-1/2 tsp
fenugreek powder-1/2 tsp
red chilli powder-to taste
curry leaves-a few
a small piece of Cinnamon
pandan leaves(if available)-1 inch
1/2 c of thin coconut milk
1/2 thick coconut milk
For seasoning-mustard seeds,curry leaves and dried red chillies-3
salt to taste
Method
Wash the dhal really well a few times
Add it to a pressure cooker with all the ingredients except the thick coconut milk
Add salt
Cook until the dhal is cooked
Add the thick coconut milk,on low heat and mix
Temper the mustard,curry leaves and red chillies in some oil and add to the dhal at the end...like a tadka
Serve hot.
While I'm sure the pandan leaves add aroma and flavour,do try the recipe even if you don't get your hands on the pandan leaves...it will still taste pretty good !!!

Wednesday, 1 January 2014

Stuffed whole tomatoes

This was something that I was meant to post before the holidays started,I missed doing so for some reason ! It was the last day of school before the Christmas break...after exams,a day to relax with friends and exchange fun stories with the teachers...so naturally I was asked if I could make 'something extra special' to add to the happiness the day would bring,to be packed into my child's lunch box...while I willingly agreed ,caught up in the excitement of impending holidays... a few moments later,I went quite blank in my head as to what that something 'extra special' could be....after foraging around for what ingredients I had to work with,it was with a bit of nervousness that I set out to make this dish !
My original idea of corn rice, spinach and curd...gave way to penne with mushroom ,stuffed whole tomatoes and curd (yogurt)...the last one is not really negotiable ;) The thought process was simple...to go with what my child loves best...tomatoes had to feature in that menu in a big way...yet I wanted to keep it light but bursting with flavour and freshness....once back home from school I was rewarded with a big smile and hugs about how 'awesome' the lunch was !!! So,with you,I share the recipe of a dish that was created on a cold December morning...straight from a mother's heart to her child's tummy !!!!!!

Stuffed whole tomatoes with corn ,mint and olives

Recipe for stuffed tomatoes
Firm red tomatoes-6
Cooked corn kernels-1 1/2 cup fulls
Mint leaves- 10 whole
Green Olives-1/2 C (pitted and sliced)
Small onions-10 ,sliced
chilli flakes ,salt
EVOO-Extra virgin olive oil
Method
Slice a thin bit off the bottom of the tomatoes,to enable them to stand upright on the baking dish.
Slice the top off and scoop out the pulp and seeds.
In a pan add 1 tsp of oil and saute' the onions lightly with salt and chilli flakes
When the onions are soft,turn off the flame and add in the corn and the olives and mix well
Check seasoning and add the mint leaves.
Put spoonfulls of this mixture into the cavity of the tomatoes,fill to the brim
Add 1/4 tsp of EVOO into each tomato
Close with the top part of the tomato,you may secure it with a toothpick if you wish !
Drizzle them again very lightly with olive oil
Bake at 200 degrees C for 30 mts until tomatoes shrink slightly and the flavours are well combined.
Pack,when hot in a steel lunch box with a spoon and a smile !
Baked and bursting with flavour

It really is so simple but tastes like a lot of effort,do try and post your comments...I'm eager to know what you thought of it !School starts again tomorrow !!!! Happy New Year :))